Back to normality and completely exhausted. I think we will be having a very quiet easter weekend. This is all I managed today, it's almost as bad as paper planes but not quite...I'm feeling a bit fed up and it reflects on my work. I am a bit stuck in all sorts of ways and need to make some decisions. It feel like nothing is working out at the moment me. So not in a good place...Maybe a bird will help to lift our spirits...
Showing posts with label paper. Show all posts
Saturday, 7 April 2012
Sunday, 25 March 2012
Day 78: Origami Crane Ear Ring
Today was about making something together with 365ers Facebook group. As we are all making something for a whole year, the idea is to make something s bit similar every now and then. So today few of us decided to be inspired by Ellen Katsumoto Fithian who is folding one crane for each day and sending them all over the world. You can find her lovely craned here: https://www.facebook.com/366Cranes, please 'like' her project.
Myself decided that folding cranes can't be that hard and I could turn this out in no time. Soon I was sweating over a youtube video not being able to make a 'petal fold', cursing myself and my stubborn head thinking that I will never make a tiny crane to become an ear ring. Two hours! later I have managed to learn how to fold a crane and made a little ear ring..pheew..that was close. Origami - not easy!
Monday, 27 February 2012
Day 50: One for the kids
I found this little project while browsing internet, looking for ideas and it really brought out the kid in me. Basically take two pieces of paper, draw a cloud shape with a little face. Fill with cotton balls or some sort of stuffing. Curt some papers in ribbons but cut them in sections so they hang together on the top. Staple round the top, insert ribbons (can be in rainbow colors too), staple the bottom together. Don't forget to fill before you staple it shut and take care while cutting shape not to cut ribbons off (i did). And there you go, a happy little cloud to put on a wall...
Monday, 20 February 2012
Day 44: Fox and Bird on tissue paper
This is one of my doodles that happen mainly while waiting in a cafe for a cup of something nice. This is drawn in pen on a tissue paper as that was all that was available but I really like it. The plan is to make it into something but time is a premium at the moment so we'll see what happens...
Sunday, 19 February 2012
Tuesday, 14 February 2012
Day 38: Star-Dog
Star-dog was my project for day 38 but as I didn't save it properly, pictures disappeared and then we had to go away and I couldn't rectify the situation. Now we are back and here he is, all toothy and happy. I had starts on my mind that whole day and it reflected in the work.
Monday, 13 February 2012
Saturday, 11 February 2012
Day 35: Art-doll
Since I have been poorly for few days my making has been non-exsisting, fever and sewing machine are not best friends. Today, as I feel better and as my blog has been featured on http://makesomething365.blogspot.com/ yay!! I decided I am well enough to continue. I think I will just add these three days on and if it takes longer then a year to complete, so what...
Anyway, I went back into the studio and already felt that little devil called lazyness telling me that I was maybe feeling too tired and maybe not good enough and maybe I should go back to telly instead. Seeing right through that, I decided to make a clutch bag...yeah, if my fuzzy brain could put instructions together I would have made one. Instructions read as well as hieroglyphs so I abandoned that, instead I decided to make a doll. But not one of those complicated with all the joints and stuff but a one piece one.
This doll, who is still nameless is made in one piece following instructions by Mindy Lacefield, http://www.timssally.com/.
Basically instructions are as follows. Cut one piece of calico and draw a doll shape on it with soft pencil. Paint face with white acrylic and when dry use acrylics to paint in the features. Transfer shape of dress on to a tissue paper and cut out. Then glue scrap paper on top of the tissue paper. ( I used an old National Geographic) When dry, machine stitch paper dress on top of calico. When you are happy with your embellishments add another piece of calico to be back of the doll, sew all around, I did not turn this doll so seams are visible. Leave one side open to stuff through or cut in the back.
When the doll gets stuffed it kind of changes appearance which I was a bit unexpected but fun...
Saturday, 4 February 2012
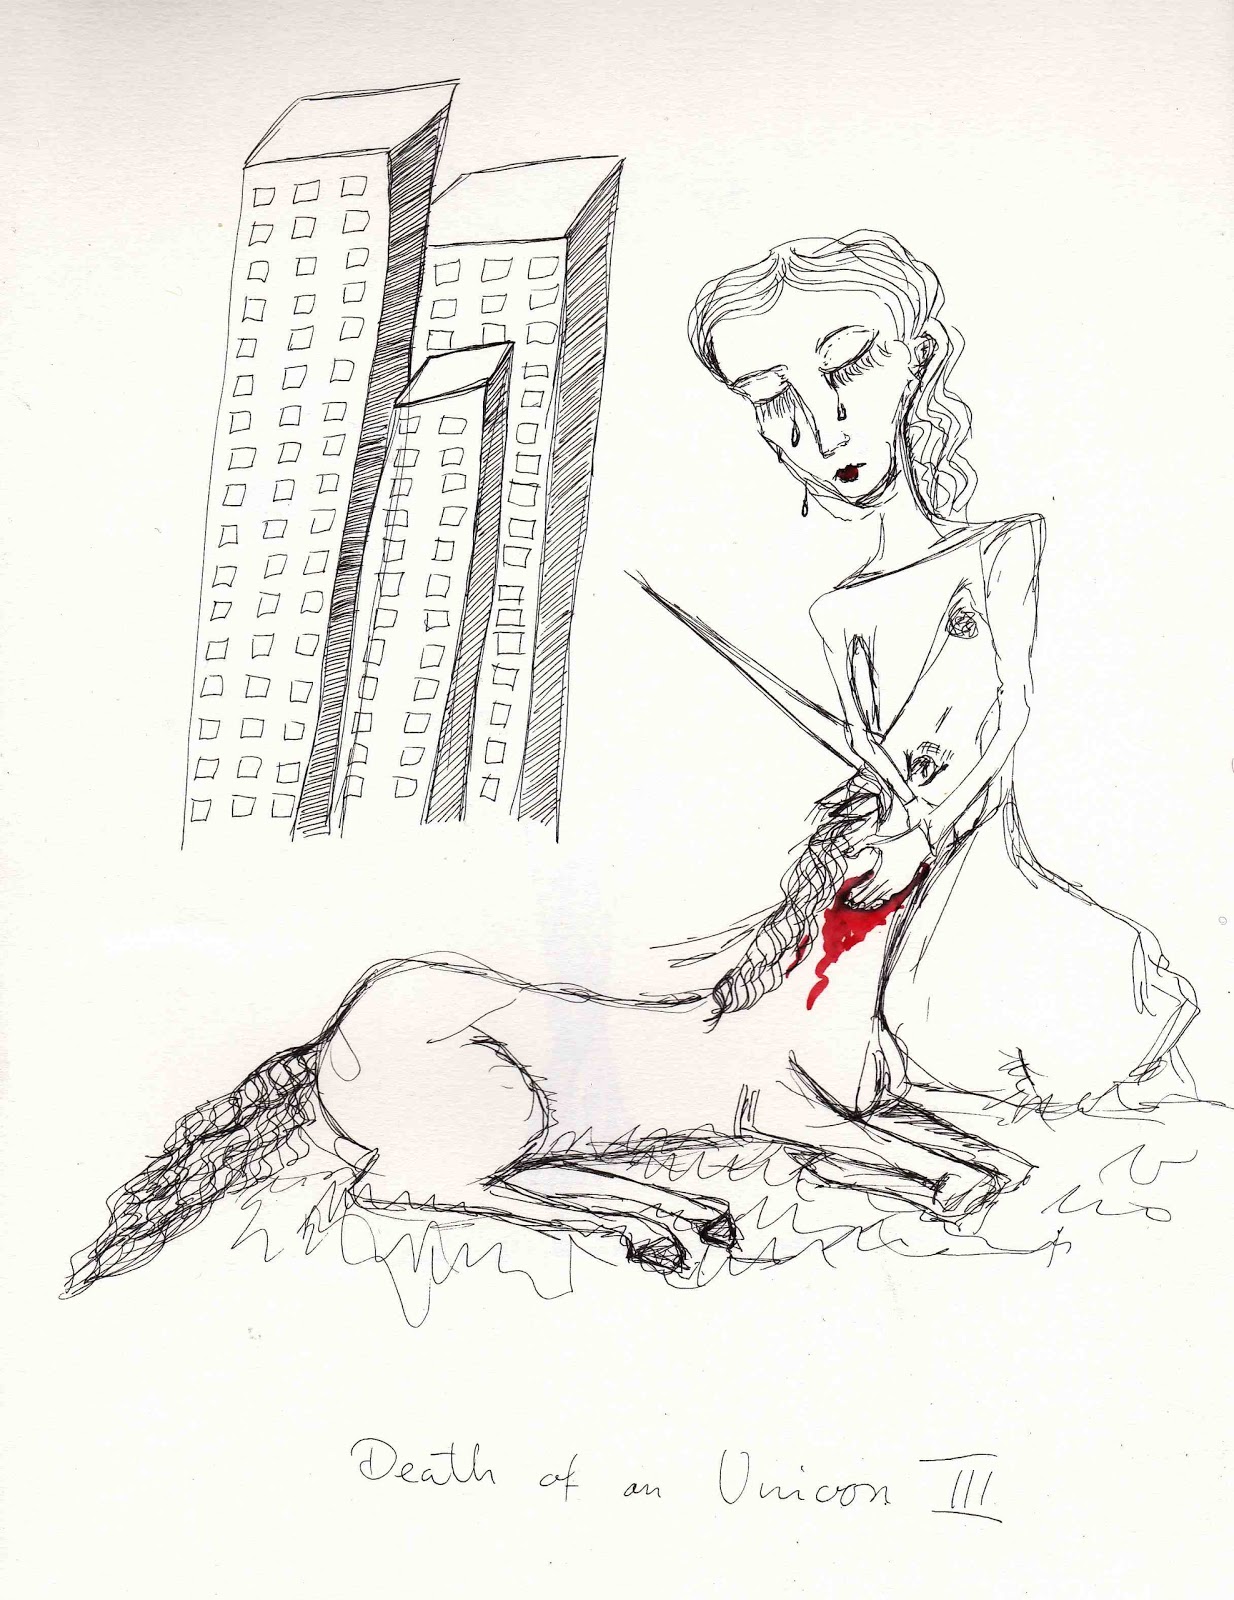
Day 31: death of an Unicorn III AND Talking to Birds I
The first picture is 'Death of an Unicorn" version three, I don't really know wht happened with my first two attempts. it was like I went backwards several years to the way I used to draw and then I snapped out of it. This version is quite Paula Rego-esk, without any intention to make it so, funny what mind retains because I never got her art by I guess my sub-conscioussness did...
Drawing number two is on theme 'Talking to Birds' as suggested by a friend of mine. I have been thinking about it for a while and have tried some other birds then i happened upon this picture of fierce falcons. I wanted the birds to be large and person small but drawing a giant chicken was not really it, although funny..maybe i'll try that. If you would like me to draw/make anything you only need to ask..
Thursday, 2 February 2012
Day 29: Polar Bear
I downloaded a free app today with pictures of wild life and liked this polar bear so much that I made a drawing out of it. It looks kind of stoic, if I may say so :) Otherwise I have been painting whole day long and I am really tired now...
Wednesday, 1 February 2012
Day 28: Happy Little Horse
I'm posting lots of drawings at the moment because my work is taking me that way. I am actually working on an important painting, important to me that is, so I don't really have time to drag the sewing machine out as it tends to take up the whole day but it will be back.
Anyhow, here is a portrait of an icelandic horse who turned out like a quite happy little chap, with a smile and all...
Monday, 30 January 2012
Day 27: Drawing on the right side of the brain
Once I was talking to a friend of mine about drawing and happened to say that I think that any artist should be able to draw. What I meant is that an effort is needed in order to make some sort of representation not that it needs to be a wonderful drawing. A lady that happened to overhear what we said turned to me and said that she can't draw and what I was saying was rubbish. Well, each to it's own.
I am not great at drawing but I do enjoy it and I am trying to work on my drawing skills. I have been following Betty Edward's technique on drawing with the right brain.
Basically, it is a technique that gets the left brain to finally shut up and stop rushing and judging and let the right brain draw what it sees.
I am showing my attempts here in order to share the fact that drawing does not come down to talent but hard work and understanding of what we see. While I am good at drawing and painting my inner world, I hugely struggle with perception and lines as well as shadows and light. I see my self as 'straight-line dyslectic', understanding straight line as well as numbers poses a challenge for me. It takes me a lot of working out in order to be able to put it on paper while other things I breeze through. But in order to be a complete artist I need both so I there is nothing to it then try and improve.
I am particularly pleased with the chair as it was a real challenge to get it together. I started with the small space between chair rest and seat and worked my way out from there piecing it together. The portrait of my cat Missy was much quicker as she moves all the time. I managed to catch her shape on my plastic viewfinder (basically a plastic overhead sheet that I draw lines on while looking through it and it makes 3d into 2d) and then photographed her while she still sat there. From those two items I produced a much more realistic drawing then my previous attempts. This is also first time I have successfully used erasing technique to create highlights.
I am not great at drawing but I do enjoy it and I am trying to work on my drawing skills. I have been following Betty Edward's technique on drawing with the right brain.
Basically, it is a technique that gets the left brain to finally shut up and stop rushing and judging and let the right brain draw what it sees.
I am particularly pleased with the chair as it was a real challenge to get it together. I started with the small space between chair rest and seat and worked my way out from there piecing it together. The portrait of my cat Missy was much quicker as she moves all the time. I managed to catch her shape on my plastic viewfinder (basically a plastic overhead sheet that I draw lines on while looking through it and it makes 3d into 2d) and then photographed her while she still sat there. From those two items I produced a much more realistic drawing then my previous attempts. This is also first time I have successfully used erasing technique to create highlights.
Day 26: Death of an Unicorn II
This is my second attempt on the same theme. I have decided that I need to work on my drawing skills so I am battling on. Much more pleased with this version then the one yesterday.
Sunday, 29 January 2012
Day 25: Death of an Unicorn
Determined to get this drawing done today although I am very tired since yesterday. Not my best one, will have to try again.
Day 24: Here's one I made earlier...
naaaa, just kidding, this is an absolute mastery of drawing and it is drawn by Leonaro da Vinci ca 500 years ago. We went yesterday to see the exhibition in National Gallery, London and I didn't make anything at all. My making for that day was looking and looking and thinking, my senses are still completely in an other world. I feel very inspired and ready for new challenges.
Although I publish projects on this blog, my real work, that takes months to develop, I don't show but I do work on it every day. This blog is more about not being lazy and exploring imagination while my painting is about patience and explorations of who we are are as beings. It is about thoughts and ideas being made visible through medium of art.
Tuesday, 24 January 2012
Day 20: Inner child satisfied - check!
Some of you might know, some of you don't, but when I was 12 years old, my family and I had to leave Croatia and flee to Sweden due to the war. On the way, we stopped in Germany for three months to catch a breath so to speak.
Being from an ex communist state, we weren't used to consumerism of Germany and especially as a child my eyes didn't know what to do with themselves from amount of toys and art stuff they were seeing. Of course we couldn't afford to spend one single shilling as we didn't know what lay ahead. So looking was about it.
At that time or maybe later, I have seen one of those Scrapefoil Gold engravings and thought that was amaaaazing art :), as kids do, but my parents could not afford it. Years passed by, we arrived to Sweden as refugees and had to scrape on the bottom of society as it is common. Things improved, and thanks to my husband's never-dying optimism and encouragement I have a lot of art stuff now.
So the other day I saw this tiger and all these things came back to me so I thought, damn it, I'm having it, silly as it may be. So here it is...one scrapefoil tiger to satisfy inner child.
Monday, 23 January 2012
Day 19: Stick-man Pop Star
This stick man is made with papier mache and then painted with guache with some glitter on top. Very pop star..
Monday, 16 January 2012
Day 12: Folkloristic Rabbit
While looking at different images of a rabbit on internet, I found a card by Karolin Schnoor that I liked. It is basically a cut out card with pins, so I decided to make one taking inspiration from hers. Perfect excuse to use my favourite color combination: super red and super blue with white. He is about 20 cm in lenght, painted with guache on card.
Sunday, 15 January 2012
Day 11: HOME
Cardboard letters and some decoupage, meaning paper and PVA glue. This is a really Kirsty Alsopp-ish peace of work, really easy and childishly fun. The paper I used is some old stamps and an old map from Oxfam shop and some nicely printed tissue paper. Good sunday project.
Subscribe to:
Posts (Atom)